
We’ve all been there—trying to capture something on our screen, only to realize we don’t have the right tools or the recording ends up a mess.
I can’t tell you how many times I’ve had to redo a screen recording because it didn’t work properly.
Whether it’s making a tutorial, sharing an epic gaming moment, or just recording a presentation, it can be frustrating if you don’t have the right tools.
But after spending hours testing multiple options in Windows 11, I’m excited to show you the best screen recording methods for 2025. Let’s dive in, shall we?
1. Xbox Game Bar: The Built-in Wonder
You might be thinking, “Isn’t Xbox Game Bar just for gaming?”
That’s what i thought at first too!
But honestly, I’ve been using it more for screen recording than anything else, and it works wonders. The best part? It’s already on your PC—no need to install anything extra.
Here’s how we use it:
- Press Windows + G to bring up the Xbox Game Bar overlay.
- Find the “Capture” widget at the top of your screen. There’s a camera icon for screenshots and a record button (the circle) for screen recording.

- A little widget will pop up showing how much time you’ve been recording. When you’re done, just hit Stop, and your recording will automatically be saved in C:\Users\yourusername\Videos\Captures.
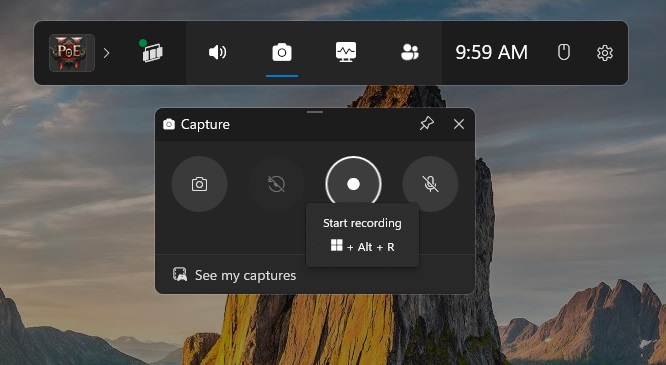
Heads up: It won’t record File Explorer or your desktop, though. Keep that in mind when setting up your recording!
2. OBS Studio: The Professional Powerhouse
Now, if you want to get serious about screen recording, OBS Studio is my go-to.
This is where the magic happens, especially if you want flawless 60fps recordings without any stuttering or frame drops.
When you need high-quality video, OBS is the tool to trust.
Here’s how to set it up:
- First, download OBS Studio from their official site.
- After launching the app, go for the “Optimize for Recording” option. It gives the best quality right off the bat.
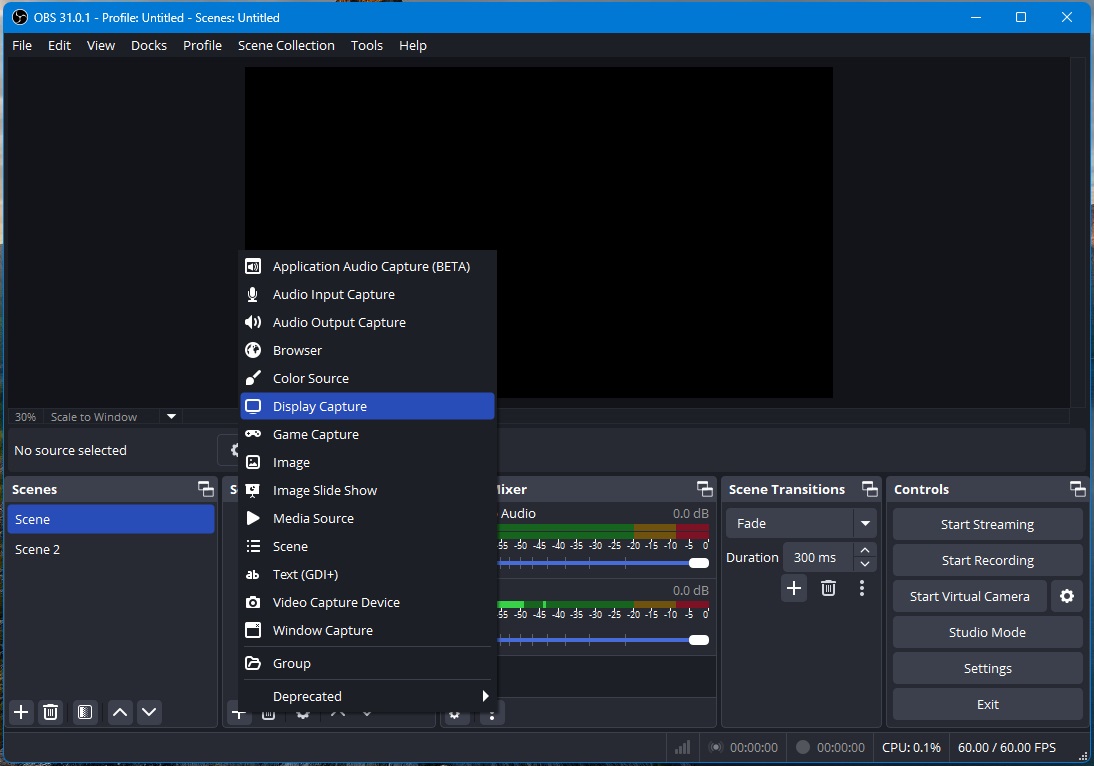
- Under “Sources,” click the + to add a source. Pick Display Capture for full screen or Window Capture if you’re recording just one specific app or window.

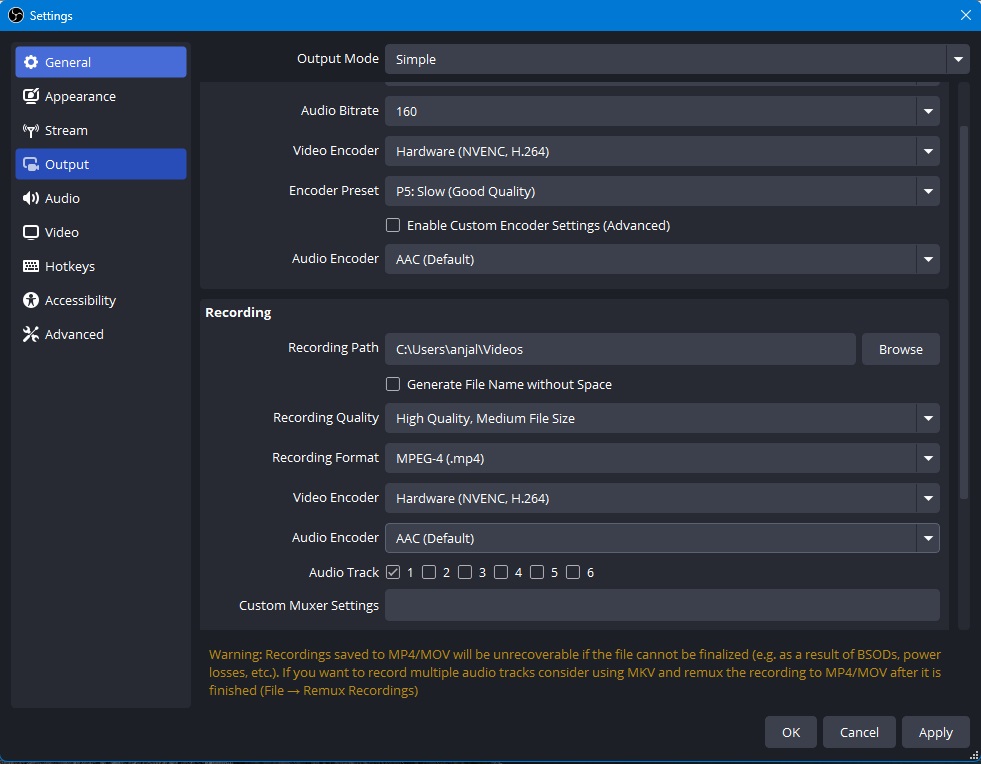
- Head to Settings > Output, and here’s where to tweak things:
- Set the format to MP4 (because who doesn’t love MP4?).
- Enable hardware encoding (if you have an NVIDIA card, go for NVENC).
- Adjust the quality to “High Quality, Medium File Size”. This keeps it looking sharp without eating up all our hard drive space.

- Once everything’s set, hit Start Recording, and when you’re done, the video is saved in C:\Users\yourusername\Videos.
Insider tip: Always enable GPU acceleration. It’s honestly a game-changer for smoother recordings. I noticed a huge improvement in quality after doing that.
3. Snipping Tool: The Surprising Contender
You know the Snipping Tool, right? The one you probably use to grab screenshots?
Well, it’s not just for screenshots anymore. I honestly didn’t expect much from this tool when I first heard it could record, but i was so wrong.
It’s simple, fast, and here’s the kicker, it’s already installed on your PC.
Here’s how to use it:
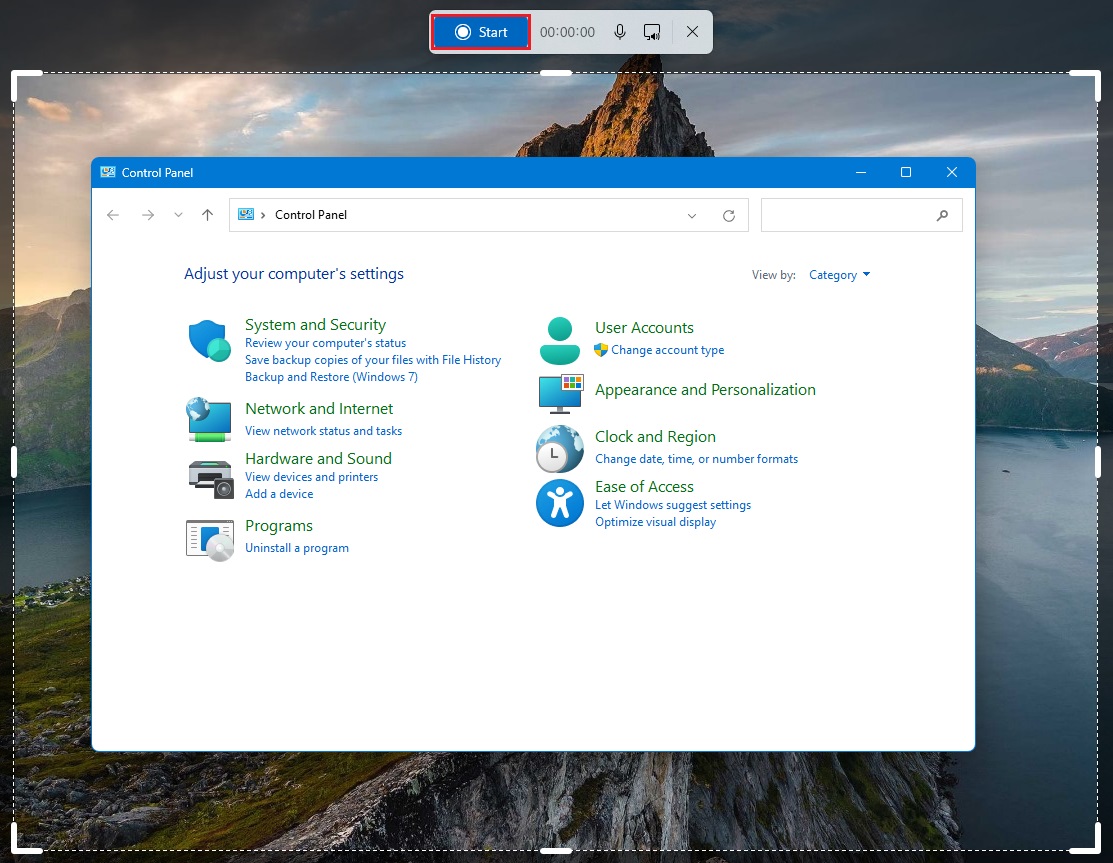
- Press Start and search for Snipping Tool or open it from the Start Menu.
- Once open, click the video camera icon, select New, and drag to select the area you want to record.

- When you’re done, hit Stop, and it automatically saves the recording in Videos\Screen recordings.
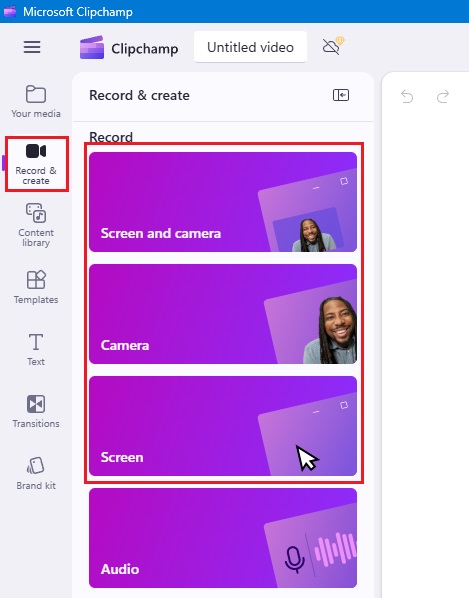
4. Clipchamp: Microsoft’s Hidden Gem
Now, let’s talk about Clipchamp. If you’ve never used it, you’re missing out.
It’s one of Microsoft’s hidden gems, and it’s perfect if you want to add a webcam overlay to your recordings. It’s something that’s typically only available in expensive software.
Here’s how we use it:
- Launch Clipchamp from the Start menu.
- Log in with your Microsoft account (you’ll need that to get started).
- From there, click Create a new video, then pick Record & Create.
- Choose Screen to decide if you want to record your whole screen or just a specific window.

- If you need a personal touch, turn on the webcam overlay to capture yourself while you record.
- When you’re done, click Share to start the recording, and Stop sharing when we’re finished.
- Click Save and Edit if we want to tweak the video a bit before using it.
Cool feature: I swear by the noise suppression feature. It clears up audio so well.
The Bottom Line
I’ve tried multiple screen recording tools over the years, and Windows 11 really delivers with its built-in options.
Whether you need something quick and simple, like Xbox Game Bar or Snipping Tool, or something more robust, like Clipchamp, there’s a perfect tool for everyone.
For even more advanced control, you can turn to third-party options like OBS Studio.
The key is to find the one that fits your workflow.
Got questions or ran into some technical hiccups? Drop a comment below! We’re always happy to help.