")
We’ve all been there – that heart-stopping moment when you realize an important file has vanished from your PC.
Accidentally deleting files is a common yet distressing experience. But here’s the good news:
Windows 11 comes equipped with powerful recovery tools that can help you retrieve those lost files.
As someone who has helped countless users navigate through this exact situation, let me show you how to turn that moment of panic into a simple recovery process.
Prerequisites
Before we begin:
- Windows Version: Ensure you are running Windows 11.
- Required Access: Administrator rights may be needed for some methods.
- Backup Recommended: Yes, create a backup if possible to avoid further data loss.
Quick Tip: It’s best not to save any new files to the drive where your deleted files were located until recovery is complete. This helps prevent overwriting the deleted data.
Recovering Deleted Files in Windows 11
Method 1: Checking the Recycle Bin
The first method is simply checking your Recycle Bin. This might seem basic, but it’s often overlooked and should be your first step when files go missing.
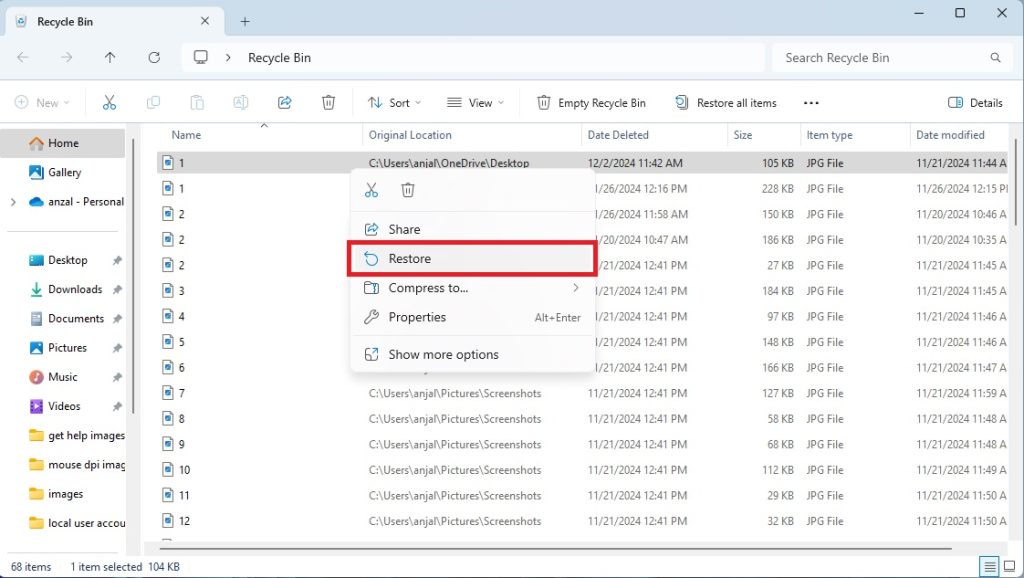
From your desktop, navigate to the Recycle Bin, which can also be found from the search bar.

Select the file or files you want to recover from the Recycle Bin.
You can right-click the files and choose ‘Restore’, or simply drag them out to your desired location.
If the deletion was recent, you could also try using the Ctrl + Z shortcut to undo the deletion instantly.
Method 2: Using Previous Versions
Previous Versions is a feature can bring back a previous version of a folder that held your lost files.
However, it only works if the feature was already enabled before the files were deleted.
Not to worry, many PCs have it enabled by default.
Here’s how you can recover using Previous Versions:
- Open File Explorer and go to the folder that previously contained the missing file.
- Right-click the folder and select ‘Properties’.

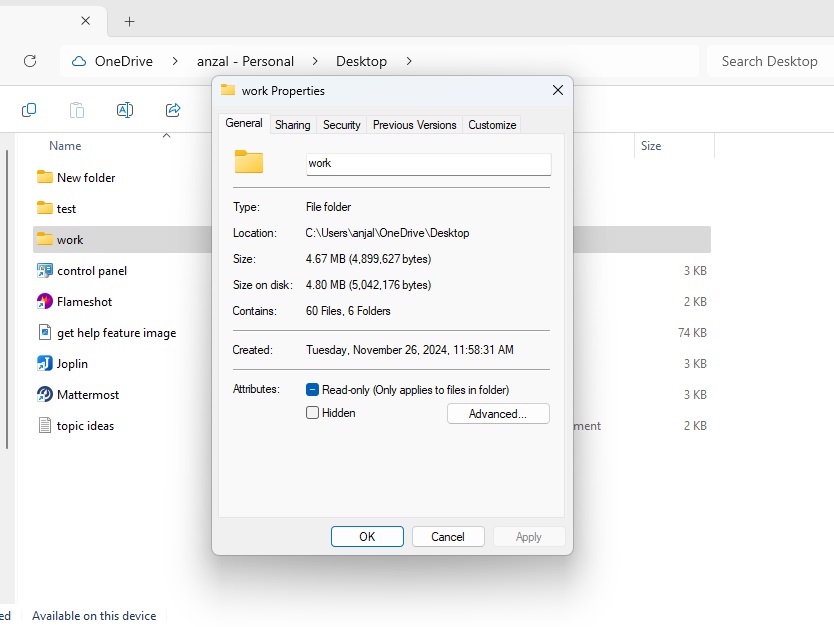
- In the dialog that pops up, click on the ‘Previous Versions’ tab.

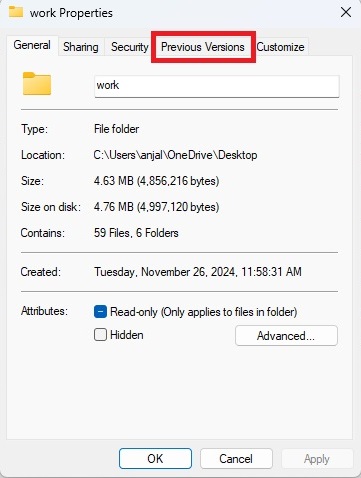
- You will see a list of restore points. Select the date you want to recover from and click ‘Restore’.
Method 3: Using File History
File History is a powerful backup feature that protects your data by automatically saving copies of your files over time.
It provides a streamlined way to recover individual files if they get lost, corrupted, or accidentally overwritten.
While similar to the Previous Versions feature, File History offers more control by allowing you to restore specific files rather than entire folders.
To use this feature, there are a few prerequisites that must be in place:
- External Storage or Network Drive: File History requires an external drive (such as a USB drive) or a network location to store backups.
- File History Enabled: You need to manually enable File History. Open the Control Panel and click on ‘System and Security’. Then click on ‘File History’.
- Once enabled, choose your backup destination (external drive or network location).
Once these requirements are met, it will start backing up your files automatically.
To recover files using File History, follow these steps:
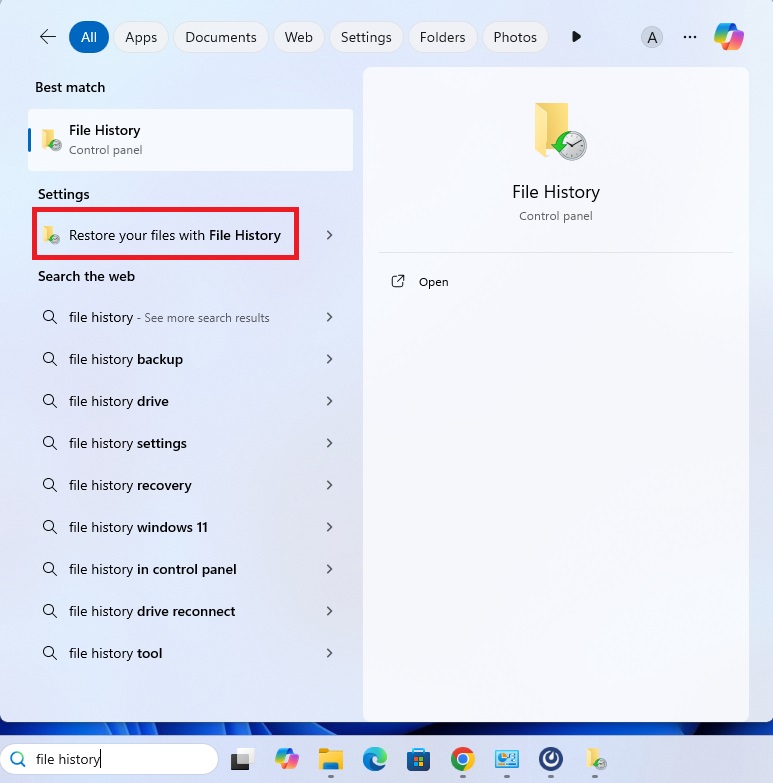
- Open Windows settings and search for ‘File History’.
- Select ‘Restore your files with File History’.

- Navigate through the folders to find the file or files you want to restore.

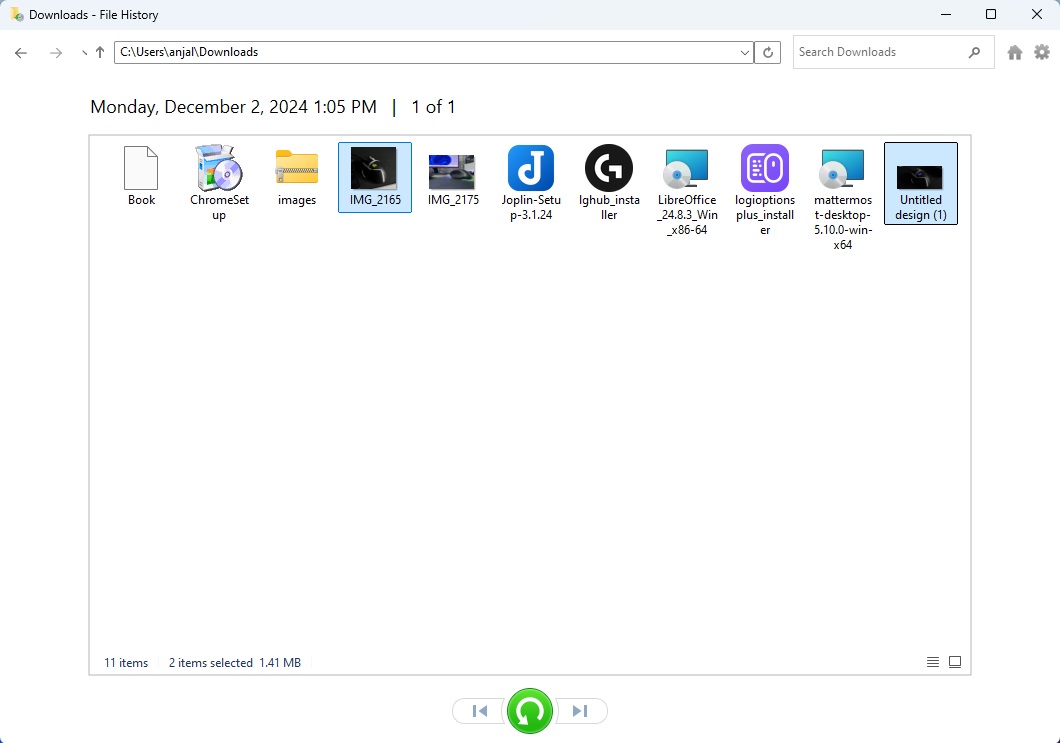
- Once you find them, select the files and click the green arrow to restore them.

To prevent future data loss, it’s a good idea to enable File History if it isn’t already active.
Method 4: Using Windows File Recovery Tool
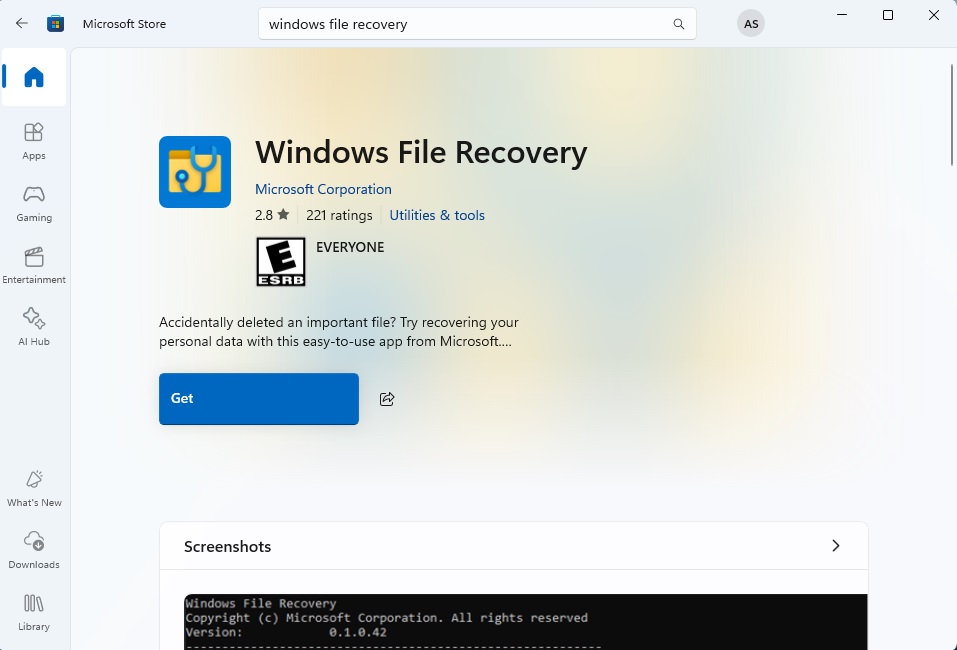
Windows File Recovery Tool is a command line utility that can be downloaded from the Microsoft Store.
It requires some technical knowledge. It may not be user friendly but it’s powerful enough to recover lost files when other methods have failed.
Here’s how to use it:
- Download the Windows File Recovery Tool from the Microsoft Store.

- Launch the app after finishing installation.
- Select “Yes” when the User Account Control prompt pops up.
- You should see Windows File Recovery appear in a Command Prompt (CMD) window.

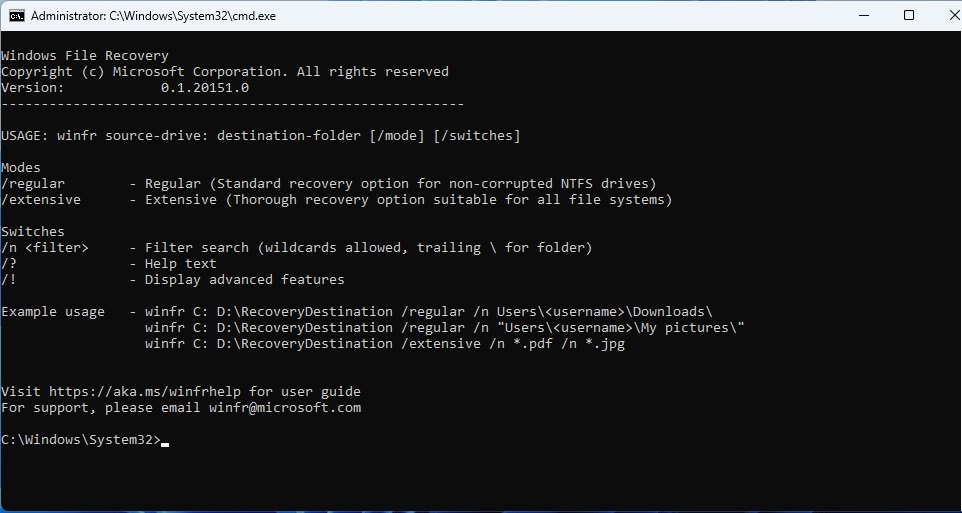
- The CMD window will display instructions for Windows File Recovery. A basic command example would be:
winfr source-drive: destination-folder [/mode] [/switches]
- Replace ‘source-drive‘ with the drive containing the lost files and ‘destination-folder‘ with the drive where you want to save them.
- There are two modes: regular and extensive. Regular mode is good for non-corrupted NTFS drives and recent file recovery. Extensive mode works with all file systems and does a more thorough search.
- Switches let you limit the search, especially with the n switch. You can use them to target a specific folder, file type, or file name, so you don’t recover everything that’s been deleted.
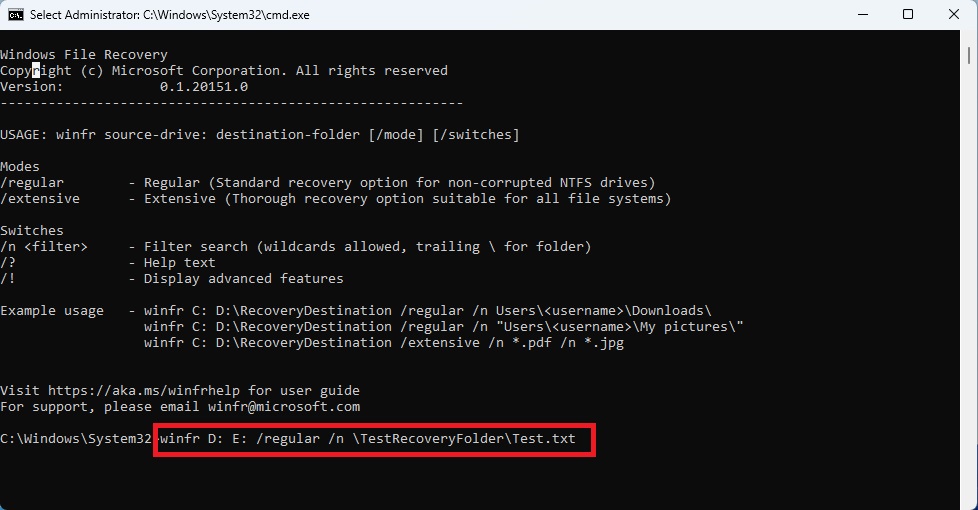
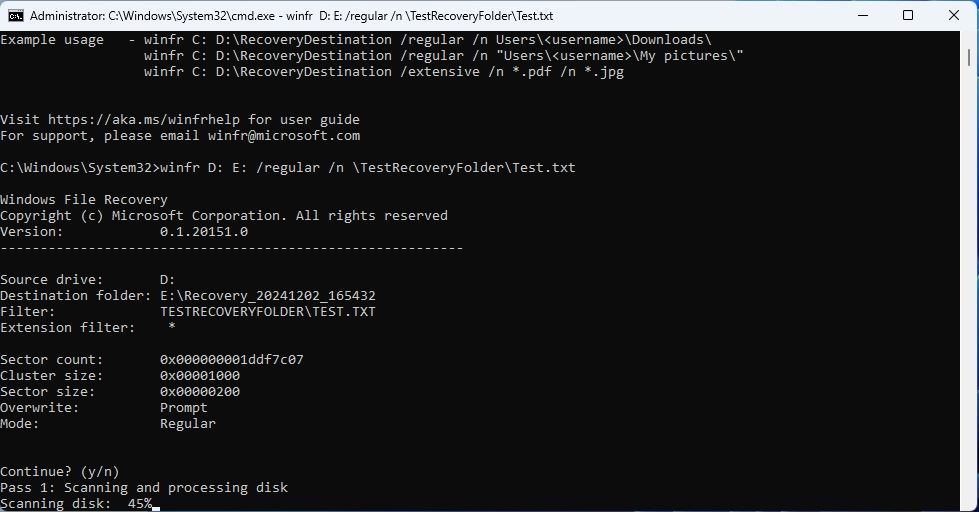
- I created a folder on the D drive named “TestRecoveryFolder” and added a text document called “Test.txt.” This command will try to recover the folder and the “Test.txt” inside it.
- Let’s assume you need to recover it from D drive to E. To do this, run the command below for a regular mode scan:
winfr D: E: /regular /n \TestRecoveryFolder\Test.txt
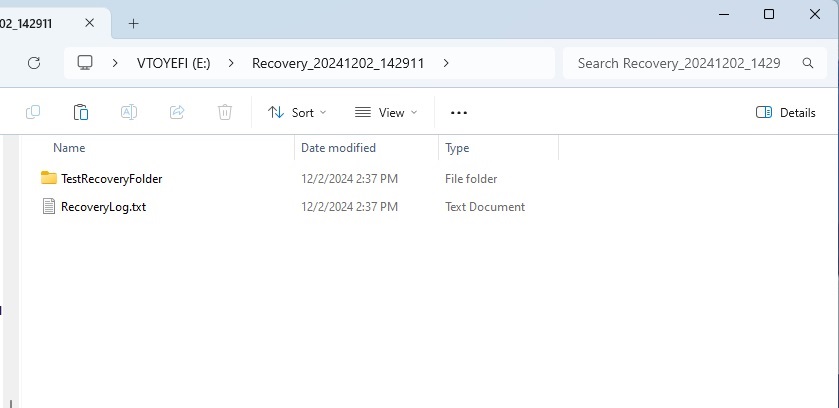
- After entering the command press “y.” The files will be recovered if possible. Press Y again to open the destination folder and view the recovered files.

Method 5: Using Third-Party Data Recovery Tools
Finally, if none of the previous methods work, you can use a third-party data recovery tool.
There are plenty of reliable options available that can scan your drive and recover deleted files. Some popular choices are Recuva, EaseUS Data Recovery, and Disk Drill.
These tools offer more advanced features and can be especially useful if other methods failed.
Most of these applications provide a user friendly interface, and many of them even offer a free trial.
Just make sure to install the software on a different drive to avoid overwriting the deleted data.
Final Tips
Here are my top recommendations:
- Act Quickly: The longer you wait, the higher the chance that new data will overwrite your deleted files.
- Enable File History: This feature can save you a lot of trouble in the future.
- Create Regular Backups: Prevention is always better than cure when it comes to data loss.